Showing posts with label Holiday Sentiments. Show all posts
Wednesday, 2 December 2015
Your Next Stamp 12 Days of Giving - Advent Calendar
Hello everyone! I am hosting over on the Your Next Stamp blog for day 2 of our newest blog series, the 12 Days of Gift Giving. Yesterday Thanh started off our gift ideas with a fabulous gift bag featuring the popper dies.
Today, I am excited to share with you an Advent Calendar I made for my daughter's using the Little Peek a Boo Door dies. I created the calendar to be 12 x 12 in size. Once the kids are finished with the Christmas countdown, I will add the Advent Calendar to my scrapbook album.
To make this calendar I used the square die from the Little Peek a Boo Door dies. I separated the pieces of the die removing the scallop. I used the inner squares which measures 2 inches square. I cut strips of paper in red and green just wider than 2 inches, to make my die cutting a little easier.
I cut 12 red and 12 green door using the two inner dies of this set.
To mat the doors, I cut 24 squares from black cardstock, which measured 2.25 inches.
Using my computer (in Word), I created a table with squares that were just under 2 inches square and typed up my list of Advent activities.
Use your paper trimmer to cut out each of your activities and adhere them directly to the black cardstock.
For your door, use 1/8 inch score tape and add adhesive around the outer edge of your die cut door piece. Be very careful not to apply the tape over your perforated line. You can also use liquid glue, however you will need to apply it very carefully. You don't want it leaking under the portion of the door that needs to open.
Adhere a strong adhesive to the back of your activity (black cardstock) piece and stick this down on your background page in your desired order. To assist with the planning for each days surprise I organized everything on my calendar, then I planned out the order on the advent calendar. Some of the activities include making things or finding a present, so I want to make sure I am prepared for those days. It also allowed me to plan for some of the more involved actives (i.e. baking, crafts watching movies and extra technology time) to fall on the weekend or during Christmas holidays.
Decorate the doors before you adhere them to your calendar.
Here is a look at my full 24 day Advent Calendar. I used both 12 x 12 and the 6 x 6 paper from Simple Stories Claus & Co. The numbers were from a collection called Dear Santa from Photoplay. You could also use stickers, stamps or die cut the numbers.
In addition to the patterned paper, I decorated the doors using various stamps, dies and of course yummy Holly Jolly Sparkly Gumdrops.
YNS Supplies: Stamps: Holiday Sentiments, Sprinkles Knit Happens (Winter hat), Cup of Cheer, Dies: Little Peek a Boo door, Mini Gingerbread Boy and Girl, Front Door (wreath), Mini Ornaments, Sled with Presents and Winter Mitten (snowflake).
Each day the girls will have a fun activity or treat to enjoy.
I will be taking pictures of each day's Advent surprise. Later I will include the calendar and the photos in my scrapbook.
This is a great way to change up your count down to Christmas, using the Little Peek a Boo Door dies. Stop back tomorrow to check out the inspiration that Sue will be sharing.
Have a fabulous and crafty day.
Tracy
Friday, 6 November 2015
Your Next Stamp Sketch/Colour challenge # 26 (Jingle all the Way)
Welcome to our sketch and colour challenge #26 at Your Next Stamp. Each challenge includes a sketch and colour options to inspire you.
Create a project based on the sketch and/or the colour combination. If you are working with the colours use at least 3 of the colours and you can add only neutrals.
I am so excited to add another Christmas card to my stash. It's the one holiday that require the largest amount of cards all in one go. For this week's challenge I used the fun Santa image from the Jingle all the Way set recently release last month.
This was such a fun sketch to play with that I didn't really change it too much. I flipped the sketch sideways and altered a few of the layers a bit. I used a smaller sentiment from the Winter Home set and stamp this on the white cardstock cut out using the Scrapwork Stripe die. To accent the trim on Santa's hat I used a little liquid glue and added white sparkling fluff.
On the inside of the card I added the quirky reindeer from the Jingle all the Way set and included a sentiment from the Holiday Sentiment set.
For our sketch and colour challenge # 26 you have until November 12, 2015 (midnight) to play along. You can see more inspiration and link up your projects over at Your Next Stamp.
One random participant will WIN a $15 gift card to the YNS store. If you feature a YNS stamp or die (must be the main focal point) you will receive and additional $5. When you use a YNS image there is also a chance of being selected as a YNS Top Pick. That's right, bragging rights for you and a fabulous badge to show off on your blog! Sounds exciting right? Ink up your stamps and show us your crafty stuff!
Have a fabulous and crafty Friday friends!
Supplies Used:
Stamps: Jingle all the Way, Holiday Sentiment and Winter Home from YNS
Dies: Scrapwork Stripe
Paper: Echo Park The Story of Christmas
Other: YNS Chocolate Gumdrops, Sparkly Fluff (Our Craft Lounge)
Create a project based on the sketch and/or the colour combination. If you are working with the colours use at least 3 of the colours and you can add only neutrals.
I am so excited to add another Christmas card to my stash. It's the one holiday that require the largest amount of cards all in one go. For this week's challenge I used the fun Santa image from the Jingle all the Way set recently release last month.
This was such a fun sketch to play with that I didn't really change it too much. I flipped the sketch sideways and altered a few of the layers a bit. I used a smaller sentiment from the Winter Home set and stamp this on the white cardstock cut out using the Scrapwork Stripe die. To accent the trim on Santa's hat I used a little liquid glue and added white sparkling fluff.
On the inside of the card I added the quirky reindeer from the Jingle all the Way set and included a sentiment from the Holiday Sentiment set.
For our sketch and colour challenge # 26 you have until November 12, 2015 (midnight) to play along. You can see more inspiration and link up your projects over at Your Next Stamp.
One random participant will WIN a $15 gift card to the YNS store. If you feature a YNS stamp or die (must be the main focal point) you will receive and additional $5. When you use a YNS image there is also a chance of being selected as a YNS Top Pick. That's right, bragging rights for you and a fabulous badge to show off on your blog! Sounds exciting right? Ink up your stamps and show us your crafty stuff!
Have a fabulous and crafty Friday friends!
Stamps: Jingle all the Way, Holiday Sentiment and Winter Home from YNS
Dies: Scrapwork Stripe
Paper: Echo Park The Story of Christmas
Other: YNS Chocolate Gumdrops, Sparkly Fluff (Our Craft Lounge)
Thursday, 15 October 2015
Your Next Stamp October Release Blog Hop
Hello and welcome to the Your Next Stamp October new release blog hop.
This month we are featuring a fun and fabulous assortment fall, winter and Christmas stamps and dies. There is so much to see on this hop, so you may want to keep a note pad to jot down some of your favourites. I was very excited about all of the amazing winter stamps for this release. I know that Hot Cocoa Phoebe is so darling and quickly becoming a favourite of mine. You can see the treat box I created for yesterday's peek here.
Keeping in line with warm winter comforts, I inked up two big mugs of hot chocolate using CUP OF CHEER. There are so many fun elements in this stamp set. You can build any type of hot beverage and add so many little extras to make a super sweet treat!
I used masking to add some of my smaller extras to the inside of mug of hot chocolate. To showcase the mug I layered them on top of the STITCHED FISHTAIL TAG TWO die.
I love the gorgeous colours in the Doodlebug Frosty Friends paper. To highlight my sentiment I used the SCRAPWORK STRIPS DIE and a couple of mint green GUMDROPS.
Here is a look at the inside of my card. I used a sentiment from the WINTER HOME stamp set.
New stamp set featured:
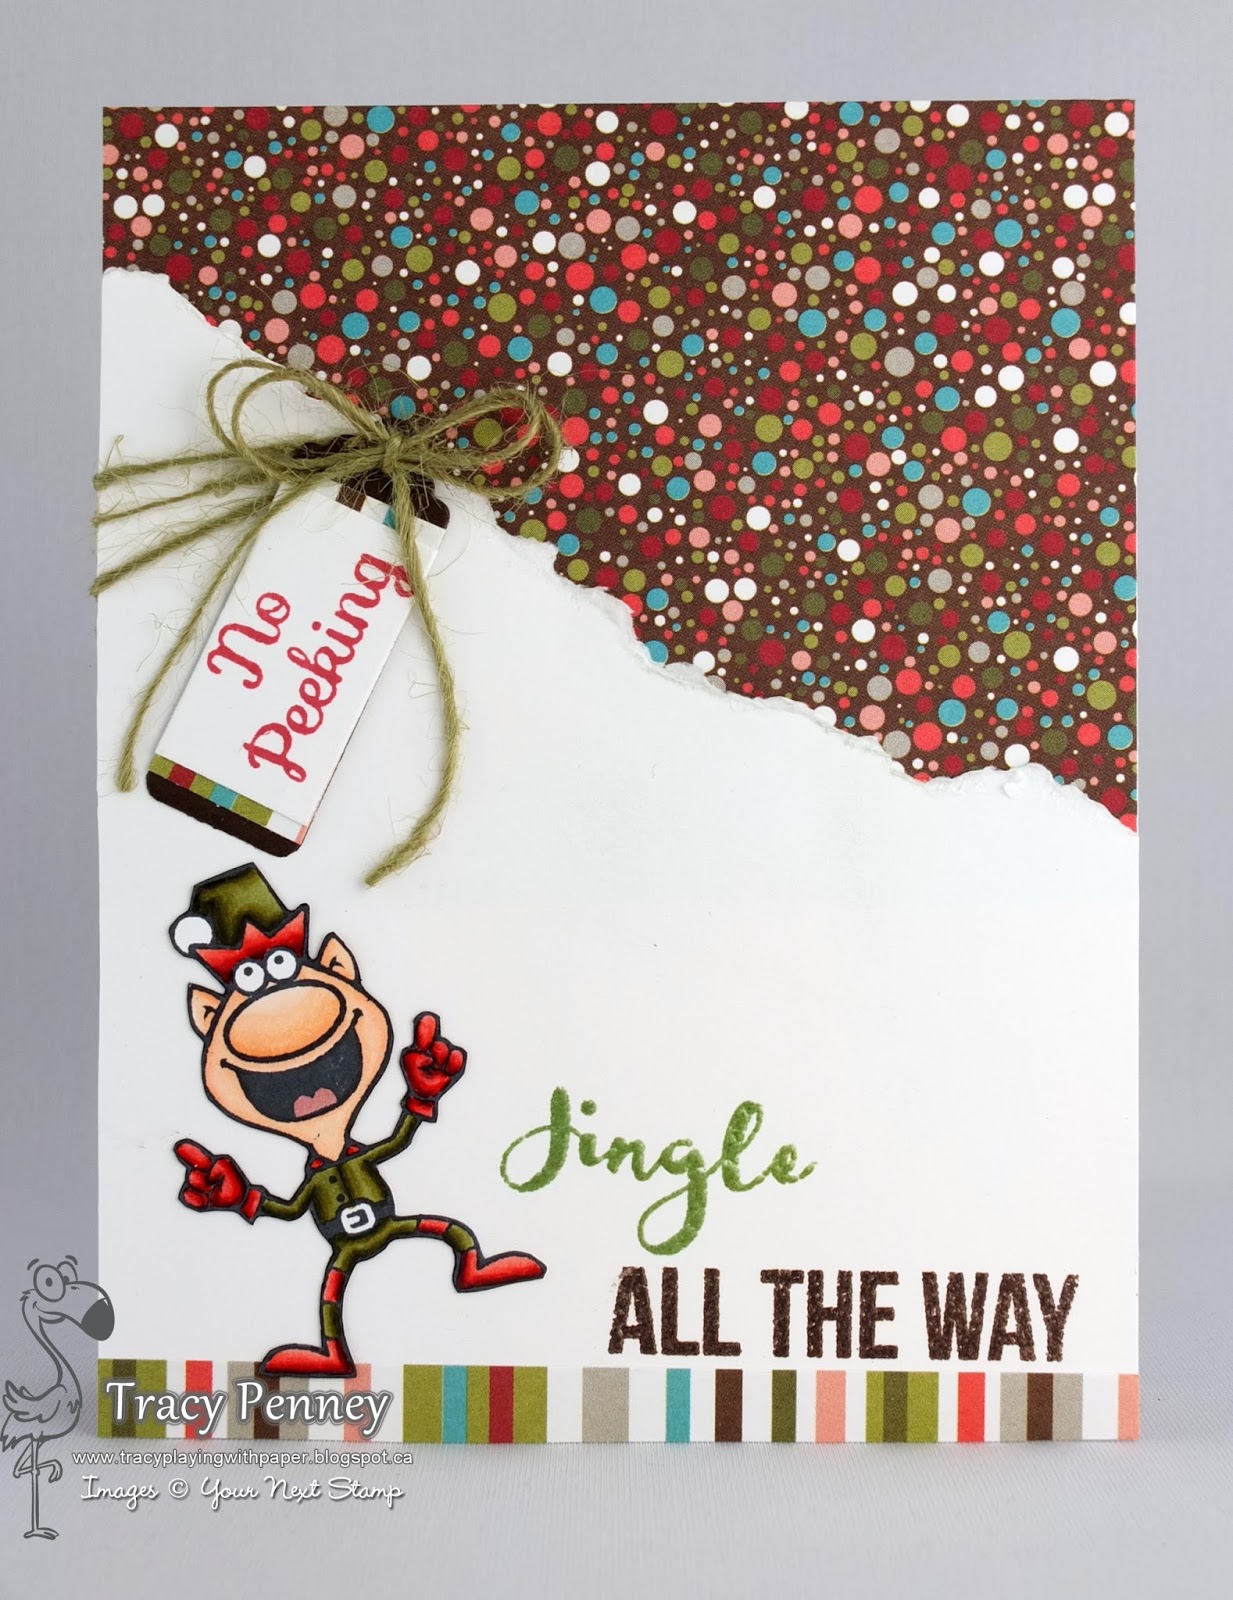
My second card features the fun dancing elf from JINGLE ALL THE WAY. I kept this card simple and wanted to have the look of someone opening a present for a little peek! Not that I would ever snoop for my Christmas presents! I used the BOOKMARK die for my tag and added the "No Peeking" from the HOLIDAY SENTIMENTS set.
On the inside of the card I added the Santa from this set and the sentiment from the HOLIDAY SENTIMENTS set.
New stamp set featured:
In celebration of this month's release, Karen has a fabulous deal for you!
Thanks for hopping along with us today. Remember to leave a comment on each of the blogs as you go. There is a fabulous prize available to one lucky stamper ($25 YNS gift certificate). All of the blogs are listed below. The hop continues until October 17th (EST) at midnight. Come back and join us on October 18th to see winner from the blog hop comments and check out the latest DESIGN TEAM DARE!
Have a great day, happy hopping!
Thursday, 7 November 2013
Letter To Santa
Okay so here is the first card I have made for the Christmas season. I think that I am the last person in the house to give into the fact that Christmas will be upon us in no time. My daughters wrote out their Christmas wish list at the start of October and my husband did his part by hanging up the light. We are not yet turning them on, it is far too early for that.
So for me the start of my holiday season begin with my cards. For my first Christmas card, I am using an adorable stamp called "Letter to Santa" from Kraftin' Kimmie Stamps.
Using this sketch from Your Next Stamp's November Challenge.
I finally dug into my supplies from the 2012 Simon Says Stamp holiday card kit. I used a square punch on 3 different pattern papers which I inked with vintage photo Distress ink. I cut a piece scrap paper, covered it with adhesive and began laying my squares starting in the centre and working out.
It is really hard to see in these photos, but on the corner of each of the squares there is a little bling.
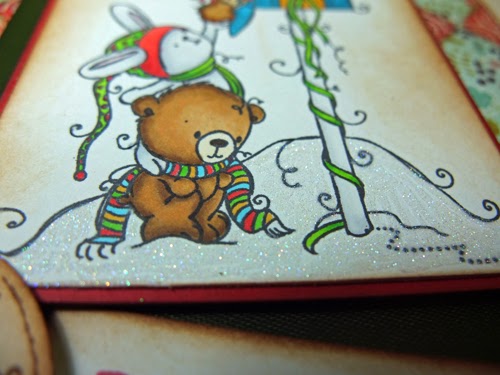
This adorable image is coloured with Copic markers. I am still trying to get the hang of colouring/shading an image I want white. My bunny is a bit more grey than I would like. I would love any tips to achieve this.
To give a bit of shimmer and create my snow, I coloured the snow area using my Zig two-way fine tip glue pen. I then added Crystal Glitter Ritz micro fine white glitter. I love how it turned out.
Of course my card would not be complete without decorating the inside. The inside sentiment is from Your Next Stamp "Holiday Sentiments".
This card is 5 x 7 inches.
Supplies:
Stamps: Kraftin' Kimmie "Letter to Santa" and "Sleigh Mail", Your Next Stamp "Holiday Sentiments"
Paper: Not sure on the companies, it was from my 2012 Simon Says Holiday Card Kit
Other: Glitter Ritz white micro fine glitter, Queen & Co. Twinkle Goosebumps, green ribbon (Michaels)
Challenges:
Kraftin' Kimmie - Challenge 203 Pick a Holiday (I pick Christmas if you couldn't already guess that.)
Your Next Stamp - November Sketch YNSFFC006
Simon Says Stamp Monday Challenge - Patchwork
Thanks for taking a peek at my first Christmas card of 2013.
Happy crafting
Tracy
So for me the start of my holiday season begin with my cards. For my first Christmas card, I am using an adorable stamp called "Letter to Santa" from Kraftin' Kimmie Stamps.
Using this sketch from Your Next Stamp's November Challenge.
I finally dug into my supplies from the 2012 Simon Says Stamp holiday card kit. I used a square punch on 3 different pattern papers which I inked with vintage photo Distress ink. I cut a piece scrap paper, covered it with adhesive and began laying my squares starting in the centre and working out.
It is really hard to see in these photos, but on the corner of each of the squares there is a little bling.
This adorable image is coloured with Copic markers. I am still trying to get the hang of colouring/shading an image I want white. My bunny is a bit more grey than I would like. I would love any tips to achieve this.
To give a bit of shimmer and create my snow, I coloured the snow area using my Zig two-way fine tip glue pen. I then added Crystal Glitter Ritz micro fine white glitter. I love how it turned out.
Of course my card would not be complete without decorating the inside. The inside sentiment is from Your Next Stamp "Holiday Sentiments".
This card is 5 x 7 inches.
Supplies:
Stamps: Kraftin' Kimmie "Letter to Santa" and "Sleigh Mail", Your Next Stamp "Holiday Sentiments"
Paper: Not sure on the companies, it was from my 2012 Simon Says Holiday Card Kit
Other: Glitter Ritz white micro fine glitter, Queen & Co. Twinkle Goosebumps, green ribbon (Michaels)
Challenges:
Kraftin' Kimmie - Challenge 203 Pick a Holiday (I pick Christmas if you couldn't already guess that.)
Your Next Stamp - November Sketch YNSFFC006
Simon Says Stamp Monday Challenge - Patchwork
Thanks for taking a peek at my first Christmas card of 2013.
Happy crafting
Tracy
Subscribe to:
Posts (Atom)