Monday, 11 November 2013

You With the Sad Eyes

I was very happy to finally get around to creating another layout. With Christmas just around the corner most of my focus has been on getting my cards made for the year.

This layout is for the monthly sketch challenge over at Two Scrapbooking friends.


This month Christa's challenge was not only for the sketch, she also suggested an additional challenge of scrapbooking the “harder stuff” in our lives. I knew immediately the photos that I wanted to use. They were ones my husband took of my youngest daughter when she was just over a year old. Although she is very sad in the pictures, I find them so beautiful. I loved both pictures and didn’t want to separate them, so my additional challenge was to modify the sketch to accommodate the second photo.

Here is my layout inspired by Christa’s amazing sketch. I flipped the sketch because I felt it suited the position of my photos. I also extended the vertical paper layers to the top of the page to balance out the additional photo on the horizontal. I have some hidden journalling under the one picture (it's peeking out in the photo).


I really love the circles Christa shows in her sketch and what they represented for her. When I started scrapbooking I never really gave much thought to the story that could be told from your layout, the papers, embellishment, even the placement of your photos. My daughter and I worked together to hand stitched the circles on the layout. The changing colours and shifting circles not only represents how much my daughter has changed in the last few years, but my growing understanding of the person she is becoming.


I struggled to find a title I thought represented my layout. I wanted the focus to be on these amazing photos, so I tried to keep the title subtle. When I first started the layout, I kept thinking “sad eyes”, then I started singing (to myself of course), “you with the sad eye”, which is the start of the song “True Colors” by Cyndi Lauper. When I thought more about the song lyrics, I realized how appropriate they really were.  So I decided to add add the song lyrics around my layout.


More of the song lyrics.


Supplies:
Paper: My Minds Eye "Cut & Paste - Adorbs"
Stickers: Authentique "Delightful" and "Fresh"
Letters: American Crafts
Other: Recollections - Wood butterfly, MME tape

Thanks for taking a look at my latest layout.

Happy creating.

Tracy

Sunday, 10 November 2013

Christmas Tags

I have continued to dip into my stash from last years Simon Says Holiday Card kit to make a few Christmas tags. Little Red Wagon has a challenge this week to create a Christmas tag. I created 3 different tags using new and older holiday supplies.

Challenge:
Little Red Wagon - # 210 A Christmas Tag


The first two tags I used supplies from the Simon Says 2012 Holiday Card kit. The red tag, I created myself and the kraft one is from my stash (Jillibean Soup).

For the Santa tag I used a Simon Says Stamp called "Gnome for the Holidays". I added the naughty and nice from a Your Next Stamp set called "Holiday Sentiments". I drew in the circle and added the present, which was made with the Simon Says Stamp Gift Box die.


The paper and the Gift Box die were from the SS Holiday card kit.


For the last tag I wanted to use some new supplies from Your Next Stamp. I used the "Ugly Sweater" Stamp and die sets. I stamped the sweater onto green paper, then cut out the image. I also stamped the reindeer on white paper, coloured it and die cut it. I then took the reindeer die and also cut the shape from the centre of the sweater, making it all one layer. The wreath is another image from the "Ugly Sweater" set, however I decided to add some Xmas Red Stickles and use it as an embellishment on the tag.

Instead of a usually tag, I decided to use a Recollections polaroid frame. I back it with red card stock and stamped my sentiment (from the Ugly Sweater stamp set) with Versa Mark ink and heat embossed with gold powder.

The other sentiment is from the Your Next Stamp "Holiday Sentiments". I haven't yet decided how I will use this particular tag. We were talking about having an ugly sweater contest at work, so this could be attached to the prize.


Do you own an "ugly" Christmas sweater? I know that I don't own any Christmas themed clothes other than an apron.

Thanks for checking out my Christmas tags. Happy crafting.

Tracy

Thursday, 7 November 2013

Letter To Santa

Okay so here is the first card I have made for the Christmas season. I think that I am the last person in the house to give into the fact that Christmas will be upon us in no time. My daughters wrote out their Christmas wish list at the start of October and my husband did his part by hanging up the light. We are not yet turning them on, it is far too early for that.

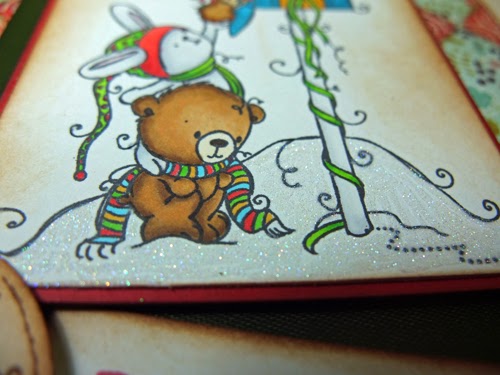
So for me the start of my holiday season begin with my cards. For my first Christmas card, I am using an adorable stamp called "Letter to Santa" from Kraftin' Kimmie Stamps.

Using this sketch from Your Next Stamp's November Challenge.


I finally dug into my supplies from the 2012 Simon Says Stamp holiday card kit. I used a square punch on 3 different pattern papers which I inked with vintage photo Distress ink. I cut a piece scrap paper, covered it with adhesive and began laying my squares starting in the centre and working out.


It is really hard to see in these photos, but on the corner of each of the squares there is a little bling.


This adorable image is coloured with Copic markers. I am still trying to get the hang of colouring/shading an image I want white. My bunny is a bit more grey than I would like. I would love any tips to achieve this.


To give a bit of shimmer and create my snow, I coloured the snow area using my Zig two-way fine tip glue pen. I then added Crystal Glitter Ritz micro fine white glitter. I love how it turned out.


Of course my card would not be complete without decorating the inside. The inside sentiment is from Your Next Stamp "Holiday Sentiments".


This card is 5 x 7 inches.

Supplies:
Stamps: Kraftin' Kimmie "Letter to Santa" and "Sleigh Mail", Your Next Stamp "Holiday Sentiments"
Paper: Not sure on the companies, it was from my 2012 Simon Says Holiday Card Kit
Other: Glitter Ritz white micro fine glitter, Queen & Co. Twinkle Goosebumps, green ribbon (Michaels)

Challenges:
Kraftin' Kimmie - Challenge 203 Pick a Holiday (I pick Christmas if you couldn't already guess that.)
Your Next Stamp - November Sketch YNSFFC006
Simon Says Stamp Monday Challenge - Patchwork

Thanks for taking a peek at my first Christmas card of 2013.

Happy crafting
Tracy


Wednesday, 6 November 2013

Love Grows Here

This is a card that I made for my mom's birthday. Unlike her anniversary card (original post: here) this card made it to my mom for her to enjoy on her birthday.

I used a Kraftin' Kimmie stamp designed by the talented Cheryl Alger called "Let's Dish the Dirt". I really love the rich fall colours that I have found in my 6x6 paper pads. I added the brown card stock in my layers to really help the colours stand out.


The image is coloured with Copic markers. I added some Tim Holtz distress ink (salty ocean and mowed lawn) to the edges. The flower was die cut from My Favorite Things layered rose and for the sentiment I used the Spellbinders standard small circles and classic scalloped circles small.


Inside the card I added two sentiments. The first is from the Let's Dish the Dirt stamp set and the birthday greeting is from Your Next Stamps "Whatnot Sentiments set one".


Challenges:
Sassy Cheryl's Digital Stamps Challenge: #191 Anything Goes
Kraftin' Kimmie Stamps: November Wonderful Wednesday

Thanks for stopping by. I hope you have a crafty day.

Tracy


Sunday, 3 November 2013

Kiersten's Crafty Creations Blog Take Over #1

Hello, my name is Kiersten and I am 9 years old. I took over my mom's blog! This is my first card that I made using a stamp from Sassy Cheryl. My mom showed me a card on the Sassy Cheryl blog made by a young girl. I really wanted to try that too. I thought it would be really fun and this is my first time entering a card challenge.

I made this card to say thank you to my teacher. I coloured the picture with pencil crayons. I used paper from my mom's scrap pile and used a sketch that my mom had in a book.

Here is my card.


Thank you for looking at my first card.


Kiersten the card creator

Challenge:
Sassy Cheryl: Challenge # 190 Let's Give Thanks

Image: Sassy Cheryl's No. 2 Pencil

You're Too Sweet

This is a card that I created for the November challenge over at Your Next Stamp. Each month they have both a sketch and inspirational photo challenges. This card is for the inspirational photo.

When I saw this photo I was drawn to the colours and apples, so I incorporated both into my card.


For my card I used Your Next Stamps Ellie Loves School. The paper is from My Minds Eye Miss Caroline 6x6 paper pad.


The image is coloured with Copic markers. The sentiment is from a My Favorite Things Stamp "Lollipop Girl". It wasn't until after I added my sentiment that I found a stamp in my stash that said "Cutie Pie". That would have tied in nicely.


The inside sentiment is also from Your Next Stamp "Heartfelt Sentiments".


This is my submission for the Your Next Stamp November 2013 YNSFFC06.

Now I feel like doing some baking. Have a sweet day!

Tracy

Saturday, 2 November 2013

Thanks for Listening

Today I was able to enjoy a bit of me time! Both of my daughter's and my husband were away on play dates. With my new seasonal Starbucks drink in hand (Gingerbread latte) I had a nice afternoon shopping (for new paper) and purchasing my first Christmas gifts. I don't expect any further purchases until the end of the month. 
Now for my creation of the day. 

A thank you card created with the super cute image from Sassy Cheryl's Stamps called Have you Heard. I absolutely love these images by the talented Cheryl Alger. I own a number of her Sassy Cheryl images and stamps she has created for Kraftin' Kimmie Stamps.

For this card I used the new sketch at Deconstructing Jen. I really love to work with Jen's sketches. I made a few minor adjustments to my card to accommodate the longer card. I love making square cards, however my image was printed a bit large so I thought it looked better on a large card base. I am still learning to work in Photoshop.


The paper for this card is from Lilybee Designs "Destination atlas" and Studio Calico. I really love the navy blue with the aqua.


The image was coloured with Copic markers.


I decorated the inside with some remaining scraps. The sentiment is from Your Next Stamp called "Heartfelt sentiments" 

Challenges:
Sassy Cheryl: # 190 Let's Give Thanks
Deconstructing Jen: Sketch No. 125

Happy creating everyone!

Tracy