Today I am sharing my tutorial over on the Kraftin' Kimmie Stamps blog on how to create this book style note holder.
Some of the supplies you will need include:
- Note Pad - this one is 4 x 5.5 inches
- Sturdy cardstock for the base - 110lb white cardstock
- Pattern Paper and coordinating cardstock (if you like to layer)
- Stamp - Kraftin' Kimmie Stamps Smarty Pants
- Embellishments
This style of note holder is really easy to make and can be modified for different size note pads. You just need to do a little planning to figure out the size of your base and where to score.
Your first step is to measure the length, width and depth of your notepad.
This notepad measures 4 by 5.5 by 0.25 inches.
You want the width of your note holder to be larger than the notepad. My front and back cover will measure 4.5 inches. I then added 0.5 inches for the depth of the note pad (this is to account for the layers that will be added when I decorate the holder).
The cardstock base I started with is 8.5 x 9.5 inches.
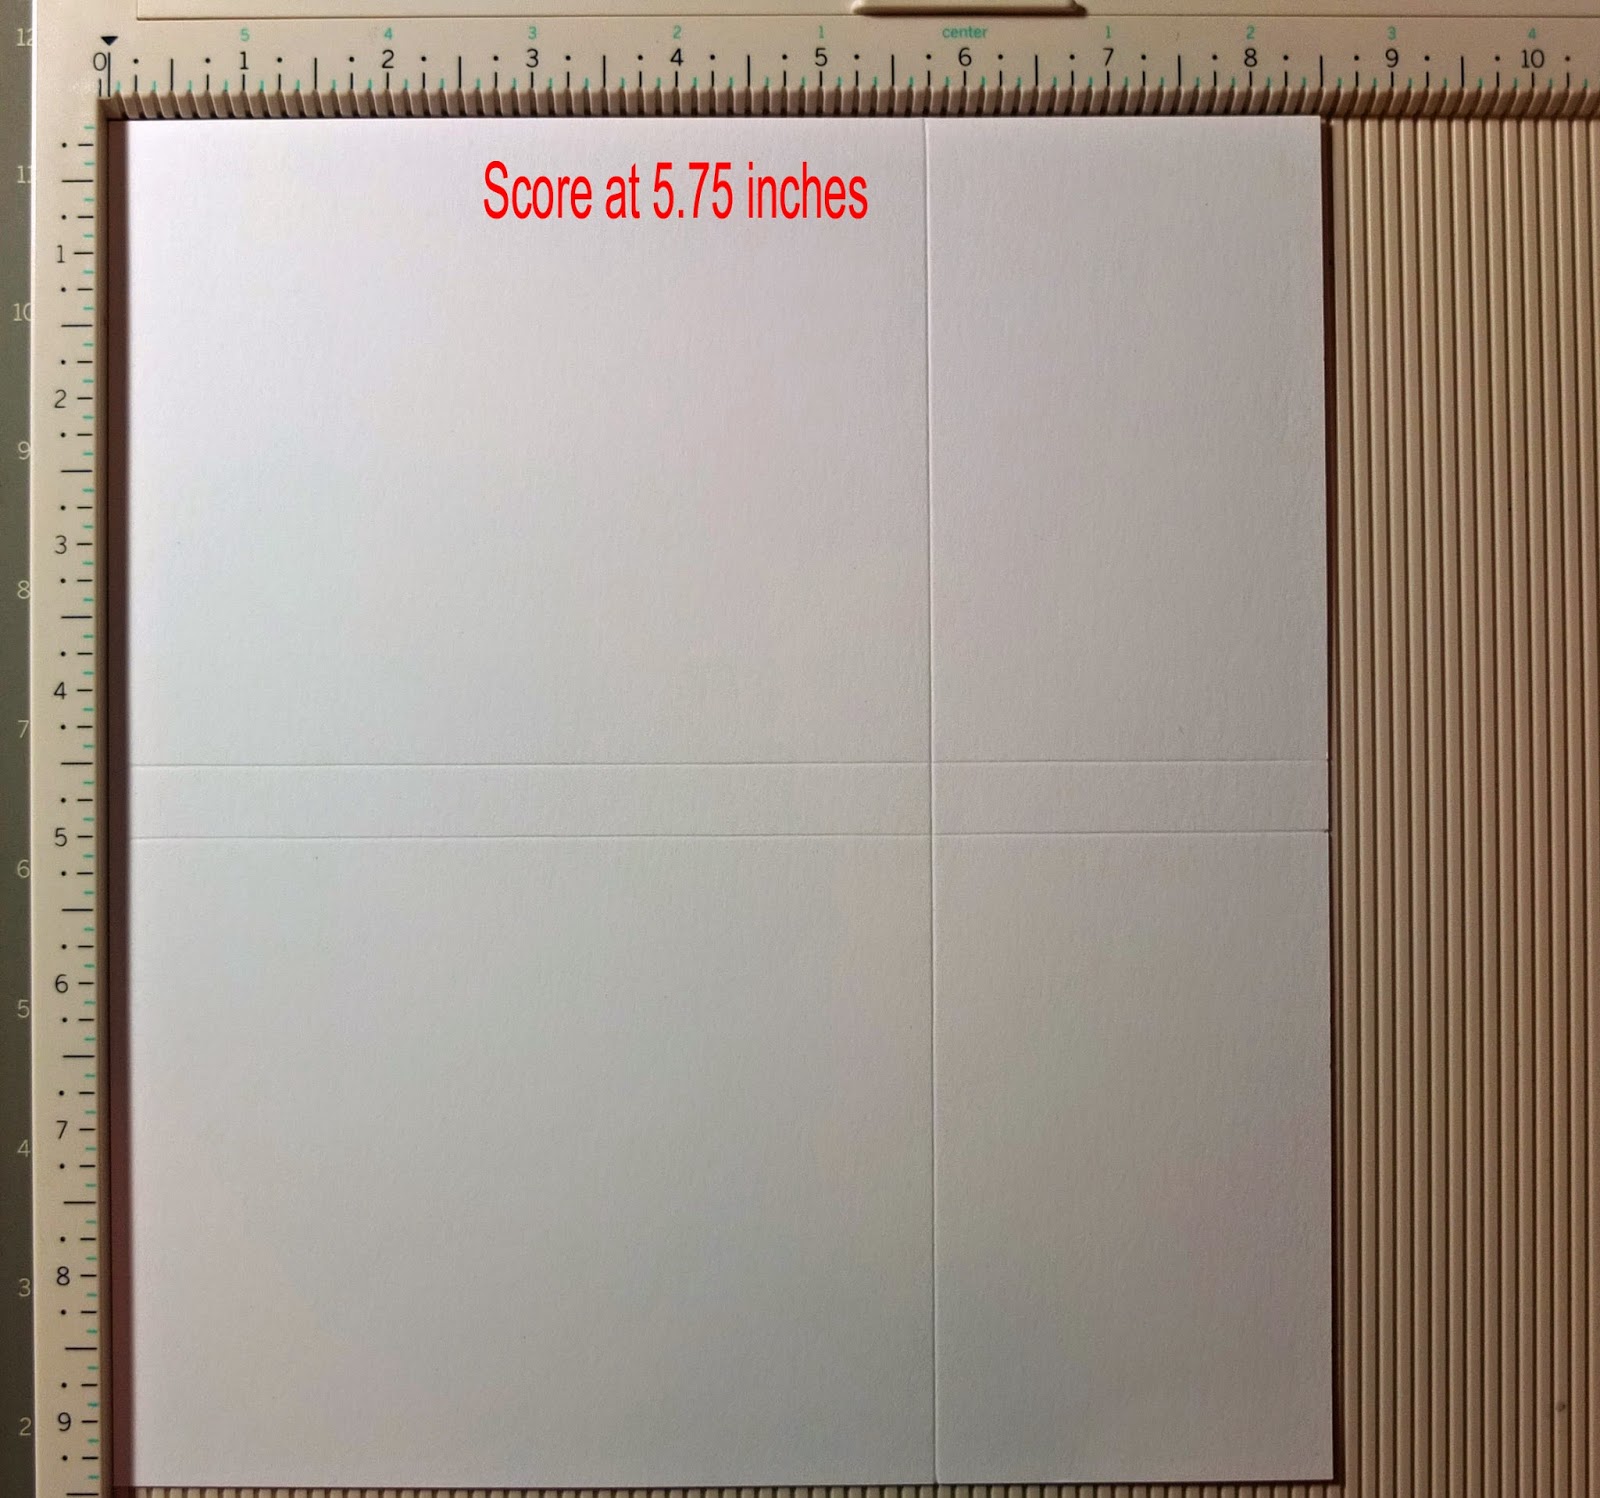
Along the 9.5 inch side of your cardstock score at 4.5 and 5 inches.
Along the 8.5 inch side of the cardstock, score just longer than the length of the notepad. I scored at 5.75 inches. This is to create a pocket for the notepad to slide into.
This is what your note holder will look like after you fold it.
The sizes for the basic layers of cardstock and pattern paper are:
- 2 cardstock @ 5 5/8" x 4 3/8" and 2 pattern paper @ 4 1/4" x 5 1/2" (front and back cover)
- 1 cardstock @ 5 5/8" x 3/8" and 1 pattern paper @ 5 1/2" x 1/4" (outside spine)
- 2 cardstock @ 4 3/8" x 3 1/4" and 2 pattern paper @ 4 1/4" x 3 1/8" (inside top panels)
- 2 cardstock @ 4 3/8" x 2 5/8" and 2 pattern paper @ 4 1/4" x 2 1/2" (inside bottom panels)
- 1 cardstock @ 3 1/4" x 3/8" and 1 patter paper @ 3 1/8" x 1/4" (inside top spine)
- 1 cardstock @ 2 5/8" x 3/8" and 1 patter paper @ 2 1/2" x 1/4" (inside bottom spine)
Start with your inside and adhere the top panels first. To help create your pocket for the note pad, add a strip of score tape to the middle spine (bottom) portion of your base.
Now you can finish adding the remaining layers on the inside.
Then you can add an image, additional layers and embellishments to the front of your note holder.
The back is also decorated to hide those staples and finish off the look of the note pad holder.
Here is a look at the inside with the notepad.
Here is a similar style note holder for a 5 x 8 x 0.25 inch note pad. This one is decorated with Pippi from the Book Pals stamp set.
For this note holder I started with a 11 x 12 inch sheet of cardstock.
Along the 11" side score at 5.5" and 6".
Along the 12"side score at 8.5"
Thanks for stopping by today. Head over to the Kraftin' Kimmie Stamps blog to check out more great Tips and Tutes from the Krafty Girls.
Have a wonderful and Krafty Day!
Tracy


Mobile phone holders have actually become popular with the stricter regulations regarding the use of cell phones and other mobile devices while driving. This post explores questions about using these holders in the car.see more at: holder of the note
ReplyDelete