Showing posts with label Smarty Pants. Show all posts

Tuesday, 23 February 2016

Kraftin' Kimmie Stamps February Scrappy Challenge (Smarty Pants)

Hello and welcome to our February Scrappy challenge at Kraftin' Kimmie Stamps.

These challenges are a lot of fun and give you a chance to use your stamps in different ways. Your creations can be ANYTHING you would like to create, but NOT a card! That leaves you a lot of room for creativity including, calendars, planner pages, bookmarks, pocket and traditional scrapbook pages. You MUST use a Kraftin' Kimmie Stamp for the Scrappy challenges. You have all month to play along, so grab some stamps and let's get KRAFTY!

Our February theme is: ANYTHING GOES

As I was trying to come up with this month's creation for the Scrappy Challenge, I came across this!


This is my husband's latest read, and there marking his page is the most recent thing within reach, a receipt! I recently made a bookmark for my oldest daughter that is usually found dog-earring her pages. Now it's my hubby who will mark his pages with scraps of what every he can find to mark his page.

For this bookmark I used one of my go to favourite Kraftin' Kimmie Sets, called SMARTY PANTS. I coloured up the cute nerdy Lucas and used paper from Echo Park Jack and Jill collection


I love the sentiments with this set.


Here is a look at the back of this bookmark.


I hope you play along with this month's SCRAPPY challenge! You can head over to the Kraftin' Kimmie Stamps blog to see more inspiration from other Krafty Girls, as well as the full details about this challenge.

Create any project (other than a card) featuring a Kraftin' Kimmie Stamps image. You have one month to play along and you can enter as many times as you like. Once the challenge reaches 5 entries, a random winner will be drawn.

Have a fabulous and Krafty day!


Supplies Used:
Stamps: Smarty Pants (Kraftin' Kimmie Stamps)
Dies: YNS Large Bookmark/Tag die
Paper: Echo Park Jack and Jill
Ink: Memento Tuxedo Black, Vintage Photo distress ink

Monday, 6 April 2015

Kraftin' Kimmie Stamps - Note Holder Tutorial (4 x 5.5 note pad)


Today I am sharing my tutorial over on the Kraftin' Kimmie Stamps blog on how to create this book style note holder.

Some of the supplies you will need include:
  • Note Pad - this one is 4 x 5.5 inches
  • Sturdy cardstock for the base - 110lb white cardstock 
  • Pattern Paper and coordinating cardstock (if you like to layer)
  • Stamp -  Kraftin' Kimmie Stamps Smarty Pants
  • Embellishments
This style of note holder is really easy to make and can be modified for different size note pads. You just need to do a little planning to figure out the size of your base and where to score.

Your first step is to measure the length, width and depth of your notepad.


This notepad measures 4 by 5.5 by 0.25 inches.

You want the width of your note holder to be larger than the notepad. My front and back cover will measure 4.5 inches. I then added 0.5 inches for the depth of the note pad (this is to account for the layers that will be added when I decorate the holder). 

The cardstock base I started with is 8.5 x 9.5 inches.

Along the 9.5 inch side of your cardstock score at 4.5 and 5 inches.


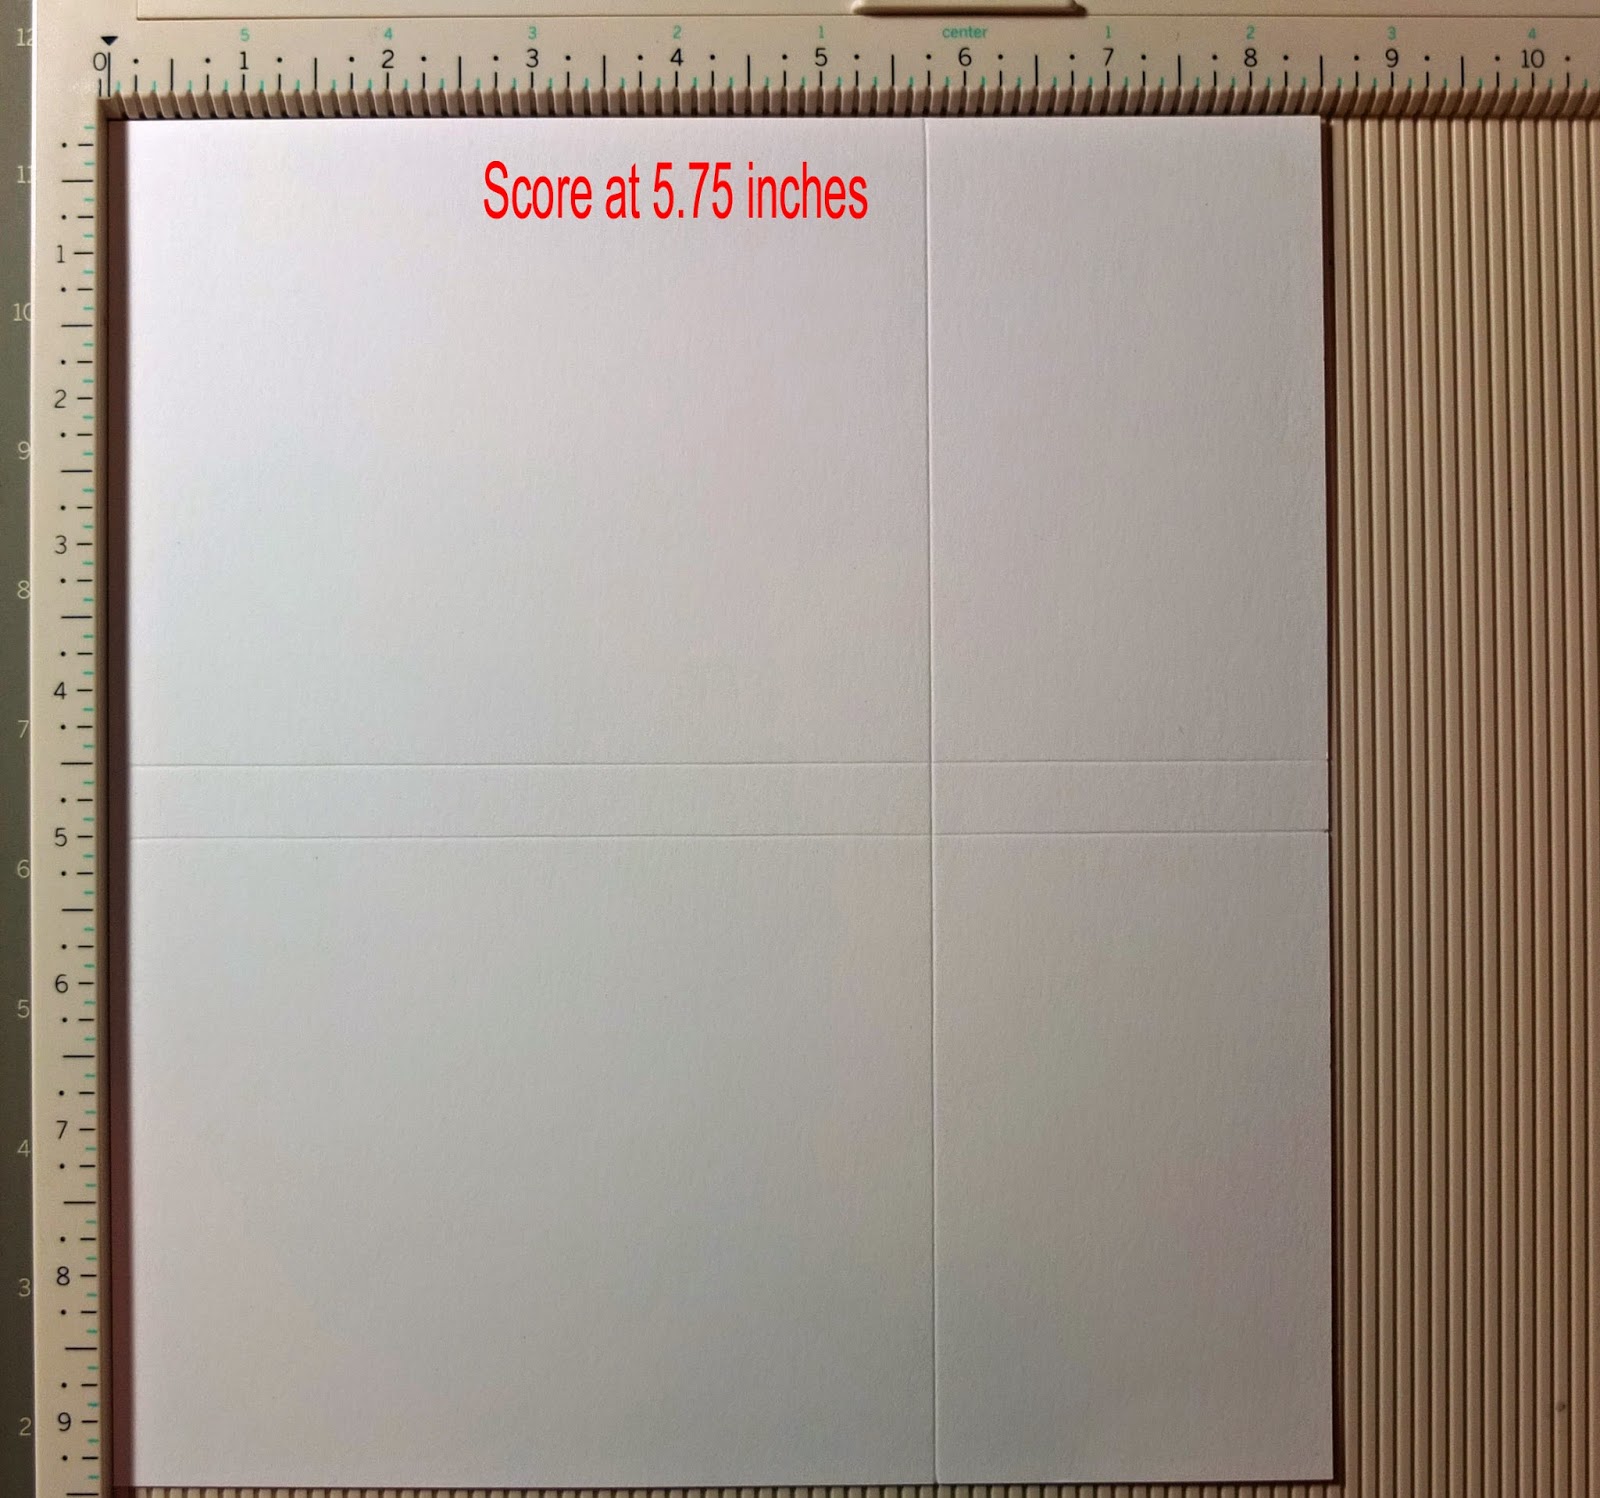
Along the 8.5 inch side of the cardstock, score just longer than the length of the notepad. I scored at 5.75 inches. This is to create a pocket for the notepad to slide into.


This is what your note holder will look like after you fold it.


From here you can start to add some of your layers to decorate.

The sizes for the basic layers of cardstock and pattern paper are:
  • 2 cardstock @ 5 5/8" x 4 3/8" and 2 pattern paper @ 4 1/4" x 5 1/2" (front and back cover)
  • 1 cardstock @ 5 5/8" x 3/8" and 1 pattern paper @ 5 1/2" x 1/4" (outside spine)
  • 2 cardstock @ 4 3/8" x 3 1/4" and 2 pattern paper @ 4 1/4" x 3 1/8" (inside top panels)
  • 2 cardstock @ 4 3/8" x 2 5/8" and 2 pattern paper @ 4 1/4"  x 2 1/2" (inside bottom panels)
  • 1 cardstock @ 3 1/4" x 3/8" and 1 patter paper @ 3 1/8" x 1/4" (inside top spine)
  • 1 cardstock @ 2 5/8" x 3/8" and 1 patter paper @ 2 1/2" x 1/4" (inside bottom spine)
Start with your inside and adhere the top panels first. To help create your pocket for the note pad, add a strip of score tape to the middle spine (bottom) portion of your base.  


After the top inside panels are decorated and the centre taped down, staple close to the edge on each side of the holder to create the pocket. I used my Tim Holtz tiny attacher, however regular staples would be fine. The staples will be hidden by the rest of the layers. You could also sew along the edge after putting your pattern paper down for added decoration.


Now you can finish adding the remaining layers on the inside.


Then you can add an image, additional layers and embellishments to the front of your note holder.


The back is also decorated to hide those staples and finish off the look of the note pad holder.


Here is a look at the inside with the notepad. 


Here is a similar style note holder for a 5 x 8 x 0.25 inch note pad. This one is decorated with Pippi from the Book Pals stamp set.


For this note holder I started with a 11 x 12 inch sheet of cardstock.

Along the 11" side score at 5.5" and 6".
Along the 12"side score at 8.5"

Thanks for stopping by today. Head over to the Kraftin' Kimmie Stamps blog to check out more great Tips and Tutes from the Krafty Girls.

Have a wonderful and Krafty Day!

Tracy