Friday, 10 April 2015

Your Next Stamp Sketch/Colour Challenge #11

Welcome sketch and colour challenge #11 at Your Next Stamp. Twice each month there will be a new sketch or colour inspiration for you to play along with.


I love this sketch and took a break from coloured images to play along with a few dies. Well that would be 5 YNS dies to be exact. The dies include:


The "Thank You" sentiment is from the A'dork'able stamp set.


Inside, I used the Smarty Pants stamp set.


For our sketch and colour challenge # 11 you have until April 16th (midnight) to play along. You can see more inspiration and link up your projects over at Your Next Stamp.

One random participant will WIN a $15 gift card to the YNS store. However, if you feature a YNS stamp or die (must be the main focal point) you will receive and additional $5. Oh yeah! When you use a YNS image there is also a chance of being selected as a YNS Top Pick. That's right, bragging rights for you and a fabulous badge to show off on your blog! Sounds exciting right? Ink up your stamps and show us your crafty stuff!

Have a fabulous and crafty Friday friends!

Tracy

Thursday, 9 April 2015

Kraftin' Kimmie Stamps Preview: Day Two - Life is a Masquerade!


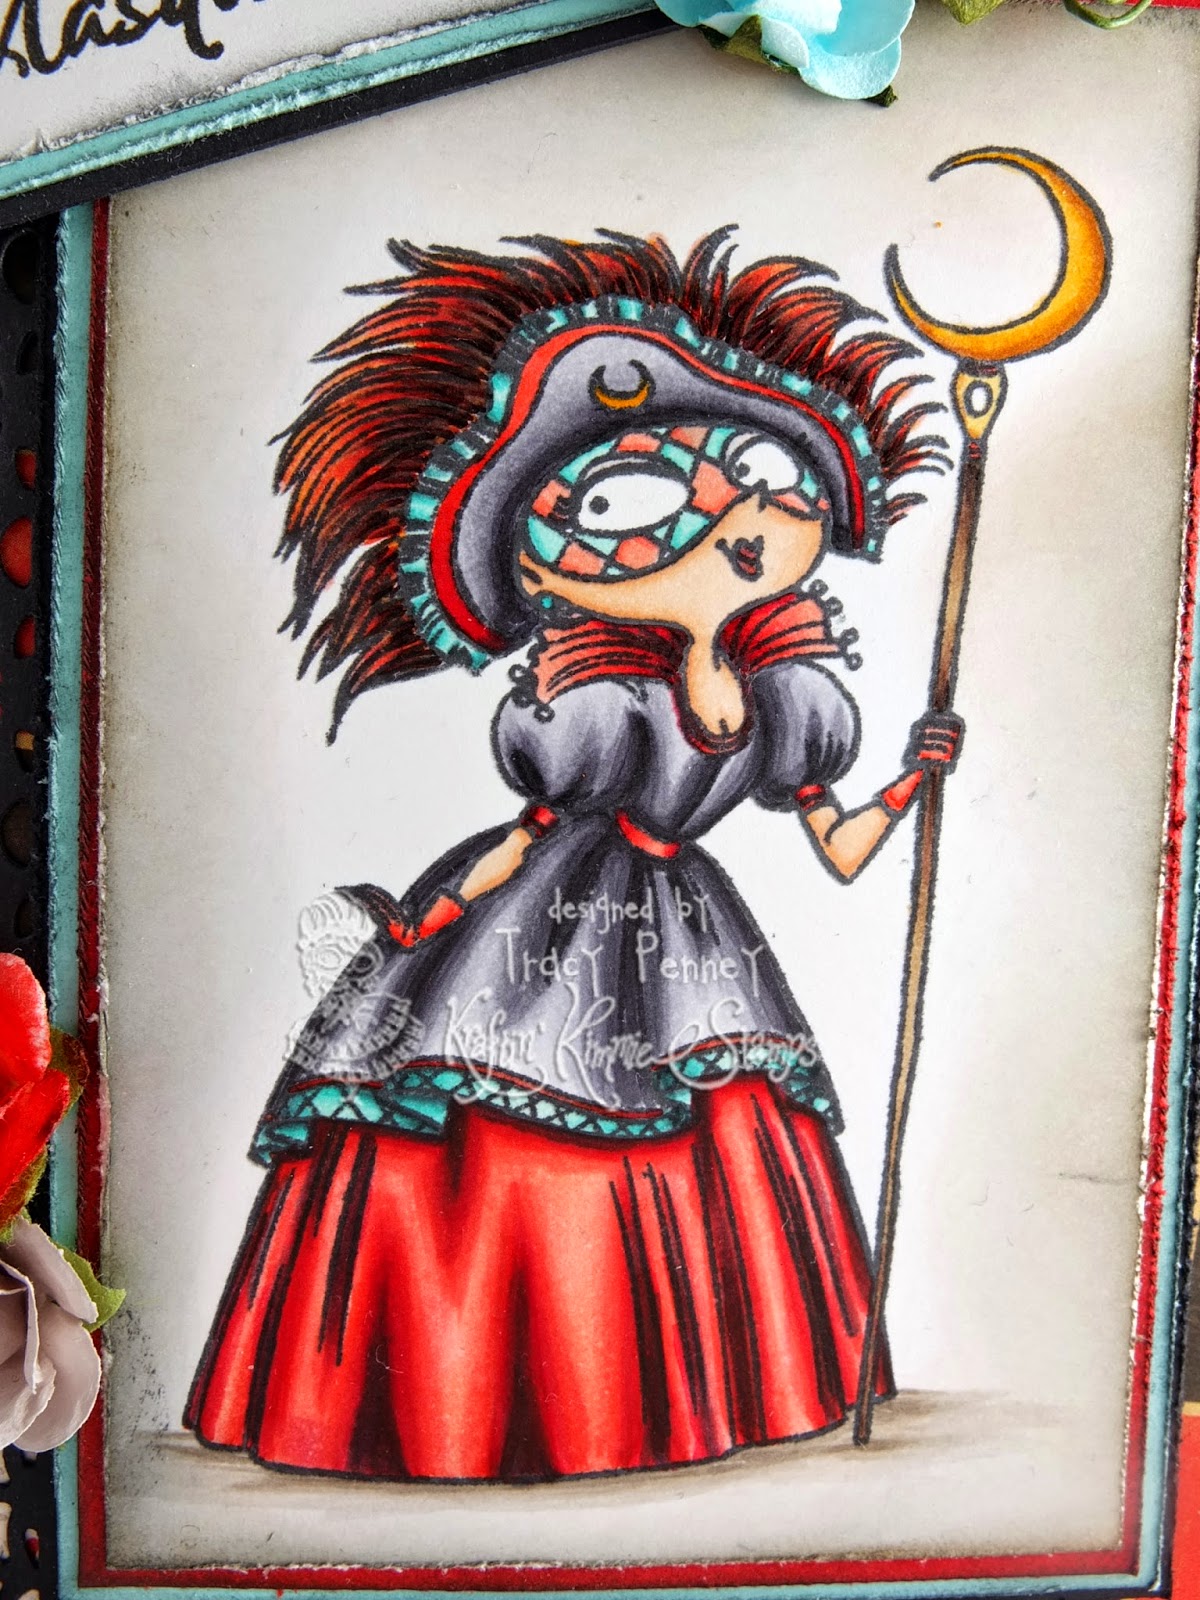
Welcome back to day TWO of our April preview at KRAFTIN' KIMMIE STAMPS. Today we are previewing a delightful set from the Artist, Annie Rodrigue. This mysterious set is called LIFE IS A MASQUERADE.


I loaded up my card with fun layers, using paper from Bo Bunny (Star Crossed). I then added flowers, embellishments and lots of distressing. This image just screams embellish me!


On the inside, I used the other image from this set.


Don't you just love these amazing Masquerade girls? To see more fabulous creations check out all of the Krafty Girls and Guests below sharing projects today. While you are visiting each of the blogs remember to leave a little love. We do enjoy reading your comments and you may just win some Krafty $ to spend in the store.

All of the April stamps will be available after the release party.


Release Party:
Join us on Saturday April 11 at 6:00 pm (EST) on the Facebook event page (HERE) for the Krafty Release Party for these amazing April stamps. You can hang out with Kimmie, and the Krafty girls, and enjoy fun and prizes.

Have a fabulous day!

Tracy

Wednesday, 8 April 2015

Kraftin' Kimmie Stamps Preview: Day One - I {heart} Coffee!


Hello Krafty Friends. Did you know that it's preview week at Kraftin' Kimmie Stamps? This is DAY ONE of the APRIL release and we are starting things off with something familiar. Today we are excited to share a variety of creations using the fabulous I {HEART} COFFEE stamp by artist Emilie Goulet. Some of the projects also feature some of the products that were available in the Coffee card kits.

The Coffee Card Kit was a big hit and you will be excited to know, the I{HEART} COFFEE stamp will be available on it's own, with this month's release (this weekend).


Today I am sharing a new project I created using the stamp, paper and embellishments in the card kit. I created a decorative box which holds 9 K-cups. The Spring Bloom paper from Kaiser Craft has so many great papers and was perfect for this box. This paper is available in the store. You can also find a number of amazing coffee theme embellishments in the store.


This box will be a great gift for a coffee loving friend. The box is really easy to make and would be great for a number of surprises.


There are a lot of tutorials out there for creating these boxes. I will see if I can put one together soon for the Kraftin' Kimmie Stamps blog. This box measures around 5.75 inches square.


Now it's time for your to hop along and check out all of the fabulous projects from the other Krafty Girls and our amazing Guests. Remember to leave a comment on each of the blogs as you hop along. There will be one lucky winner drawn at random to WIN some Krafty $ to spend in the KKS store. Hop, comment and you may just WIN! The winners will be announced on Saturday at the release party.

All of the April release stamps will be available after the release party!

Facebook Release Party
Join Kimmie, the Krafty Girls, Guests and our Krafty friends as we party and celebrate the April release. The party will be on the Facebook events page (here) on Saturday April 11th at 6:00 pm (EST). Hope to see you there.

Thanks for stopping by today. Have a wonderful and Krafty day!

Tracy

Little Red Wagon - Spring is in the Air


Welcome to another challenge at LITTLE RED WAGON. This week COLLETTE is in charge and her challenge is all about SPRING. More specifically she wants to see a project with a strong floral theme. Well considering we were showered with a nice covering of snow this past Easter weekend, I am happy to flaunt the florals!

For my card I dug into my stash and pulled out a stamp that I have had for almost a year and not yet used. I am ashamed. This My Favorite Things Birdie Brown Sunflower Sweetheart. She is now inked, coloured and placed on a lovely card filled with pretty coloured flowers. The bright Doodlebug paper (Happy Camper) was perfect for this image.


Here is a look at the inside of the card.


Join us this week for our SPRING IS IN THE AIR challenge at Little Red Wagon. Link up your project at the blog. If you need a bit of inspiration, the other LRW Girlfriends will have lots to show off this week. Take a peek.

Thanks for stopping by today. Have a wonderful day.

Tracy

Monday, 6 April 2015

Kraftin' Kimmie Stamps - Note Holder Tutorial (4 x 5.5 note pad)


Today I am sharing my tutorial over on the Kraftin' Kimmie Stamps blog on how to create this book style note holder.

Some of the supplies you will need include:
  • Note Pad - this one is 4 x 5.5 inches
  • Sturdy cardstock for the base - 110lb white cardstock 
  • Pattern Paper and coordinating cardstock (if you like to layer)
  • Stamp -  Kraftin' Kimmie Stamps Smarty Pants
  • Embellishments
This style of note holder is really easy to make and can be modified for different size note pads. You just need to do a little planning to figure out the size of your base and where to score.

Your first step is to measure the length, width and depth of your notepad.


This notepad measures 4 by 5.5 by 0.25 inches.

You want the width of your note holder to be larger than the notepad. My front and back cover will measure 4.5 inches. I then added 0.5 inches for the depth of the note pad (this is to account for the layers that will be added when I decorate the holder). 

The cardstock base I started with is 8.5 x 9.5 inches.

Along the 9.5 inch side of your cardstock score at 4.5 and 5 inches.


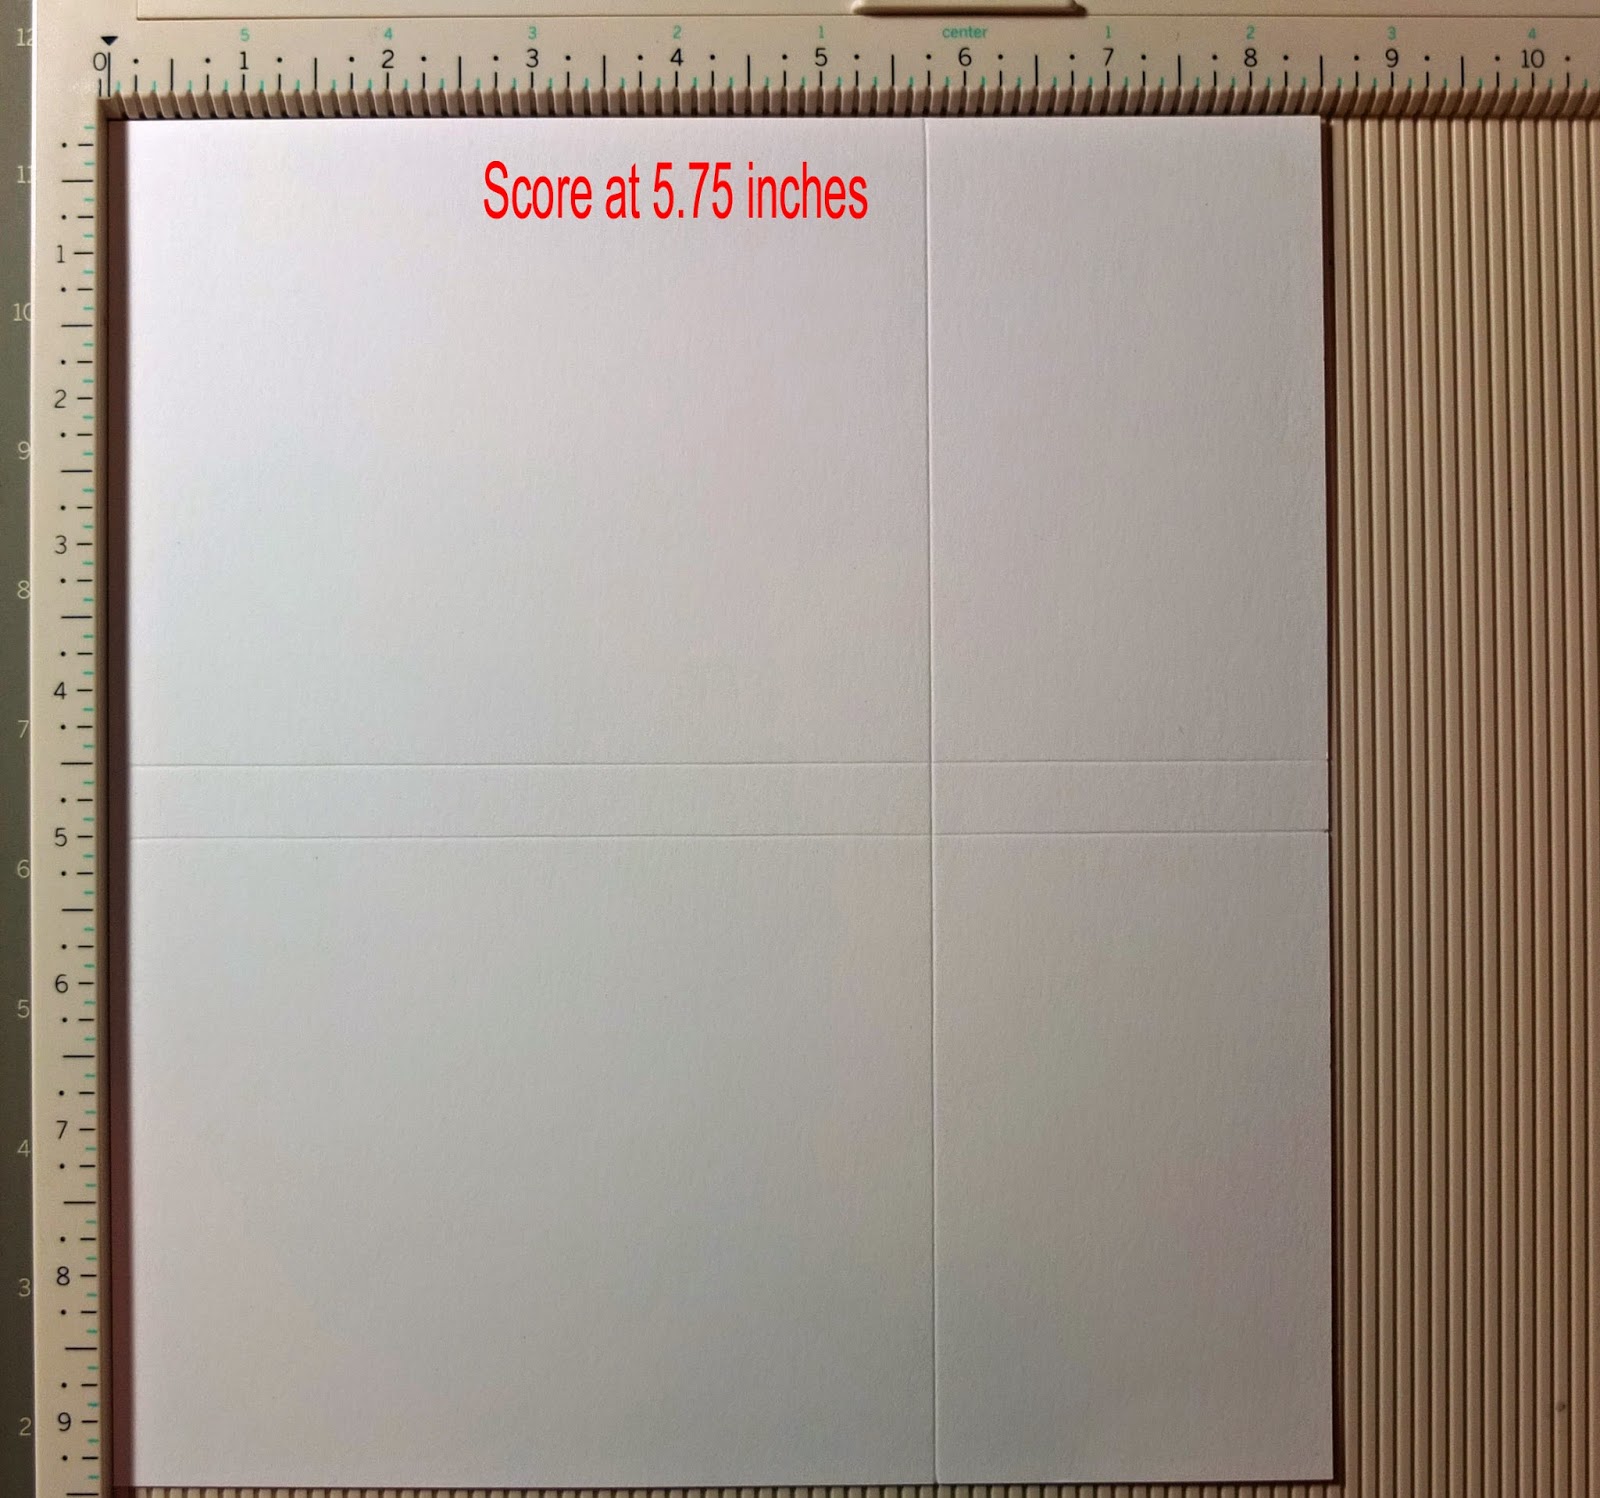
Along the 8.5 inch side of the cardstock, score just longer than the length of the notepad. I scored at 5.75 inches. This is to create a pocket for the notepad to slide into.


This is what your note holder will look like after you fold it.


From here you can start to add some of your layers to decorate.

The sizes for the basic layers of cardstock and pattern paper are:
  • 2 cardstock @ 5 5/8" x 4 3/8" and 2 pattern paper @ 4 1/4" x 5 1/2" (front and back cover)
  • 1 cardstock @ 5 5/8" x 3/8" and 1 pattern paper @ 5 1/2" x 1/4" (outside spine)
  • 2 cardstock @ 4 3/8" x 3 1/4" and 2 pattern paper @ 4 1/4" x 3 1/8" (inside top panels)
  • 2 cardstock @ 4 3/8" x 2 5/8" and 2 pattern paper @ 4 1/4"  x 2 1/2" (inside bottom panels)
  • 1 cardstock @ 3 1/4" x 3/8" and 1 patter paper @ 3 1/8" x 1/4" (inside top spine)
  • 1 cardstock @ 2 5/8" x 3/8" and 1 patter paper @ 2 1/2" x 1/4" (inside bottom spine)
Start with your inside and adhere the top panels first. To help create your pocket for the note pad, add a strip of score tape to the middle spine (bottom) portion of your base.  


After the top inside panels are decorated and the centre taped down, staple close to the edge on each side of the holder to create the pocket. I used my Tim Holtz tiny attacher, however regular staples would be fine. The staples will be hidden by the rest of the layers. You could also sew along the edge after putting your pattern paper down for added decoration.


Now you can finish adding the remaining layers on the inside.


Then you can add an image, additional layers and embellishments to the front of your note holder.


The back is also decorated to hide those staples and finish off the look of the note pad holder.


Here is a look at the inside with the notepad. 


Here is a similar style note holder for a 5 x 8 x 0.25 inch note pad. This one is decorated with Pippi from the Book Pals stamp set.


For this note holder I started with a 11 x 12 inch sheet of cardstock.

Along the 11" side score at 5.5" and 6".
Along the 12"side score at 8.5"

Thanks for stopping by today. Head over to the Kraftin' Kimmie Stamps blog to check out more great Tips and Tutes from the Krafty Girls.

Have a wonderful and Krafty Day!

Tracy

Saturday, 4 April 2015

Kraftin' Kimmie Stamps - Inside and Out


Today I am hosting our Saturday challenge over at Kraftin' Kimmie Stamps. This week it's all about decorating your cards on the inside and out.

Grab your stamps (all are welcome) and create a NEW card to match this week's theme. You can share it with us on Krafty Friends Facebook in our group (here) or link up your blog post over at the Kraftin' Kimmie blog. You have all week to play along and there is a chance to WIN $10 gift card to the KKS shop. If you do use a Kraftin' Kimmie Stamp on your project, you will double your chance to win. You have until April 10th at 11:55 pm (EST) to play along.

We have a new fabulous sketch for this month. You can use it in any of the challenges for April and it will give you a extra chance to win a gift card for the store.


One comment that I often get with my cards, is that people love that I decorate the inside of my cards. I love the added creative surprise when people open their card. It's also a great way to use up some scraps and show off more of your stamps.

For my card today I used the fun WORLD OF WONDER stamps from artist Emilie Goulet. The paper is an older pad I had in my stash from MME (Notable).


Here is a look at the inside of my card. To coordinate with the outside, I like to use the same pattern paper and cardstock from the front of the card. When the stamp set allows, I also like to add an additional image, stamping it as a watermark in a coordinating colour. It's a fun way to tie the card together.

Most times I will make a commitment on the occasions for my card and finish everything off nicely with a sentiment. This card will likely end up as a birthday card, however I decided for now to keep my options open.


Grab you paper and stamps and play along with this week's INSIDE AND OUT challenge. Head over to the Kraftin' Kimmie Stamps blog to see more about this week's challenge have look at some inspiration from my talented teammates.

Have you checked out the FRUGAL FRIDAY sales going on right now. There are dozens of stamps currently on sale, so you will want to check it out. The sale is only for the weekend.

Thanks for stopping by today. Have a super Saturday!

Tracy

Wednesday, 1 April 2015

Little Red Wagon # 283 Call the Vet


Welcome to this week's LITTLE RED WAGON challenge. Susie is kicking off a brand new month and her challenge is CALL THE VET! This means she is looking to see an animal on your project.

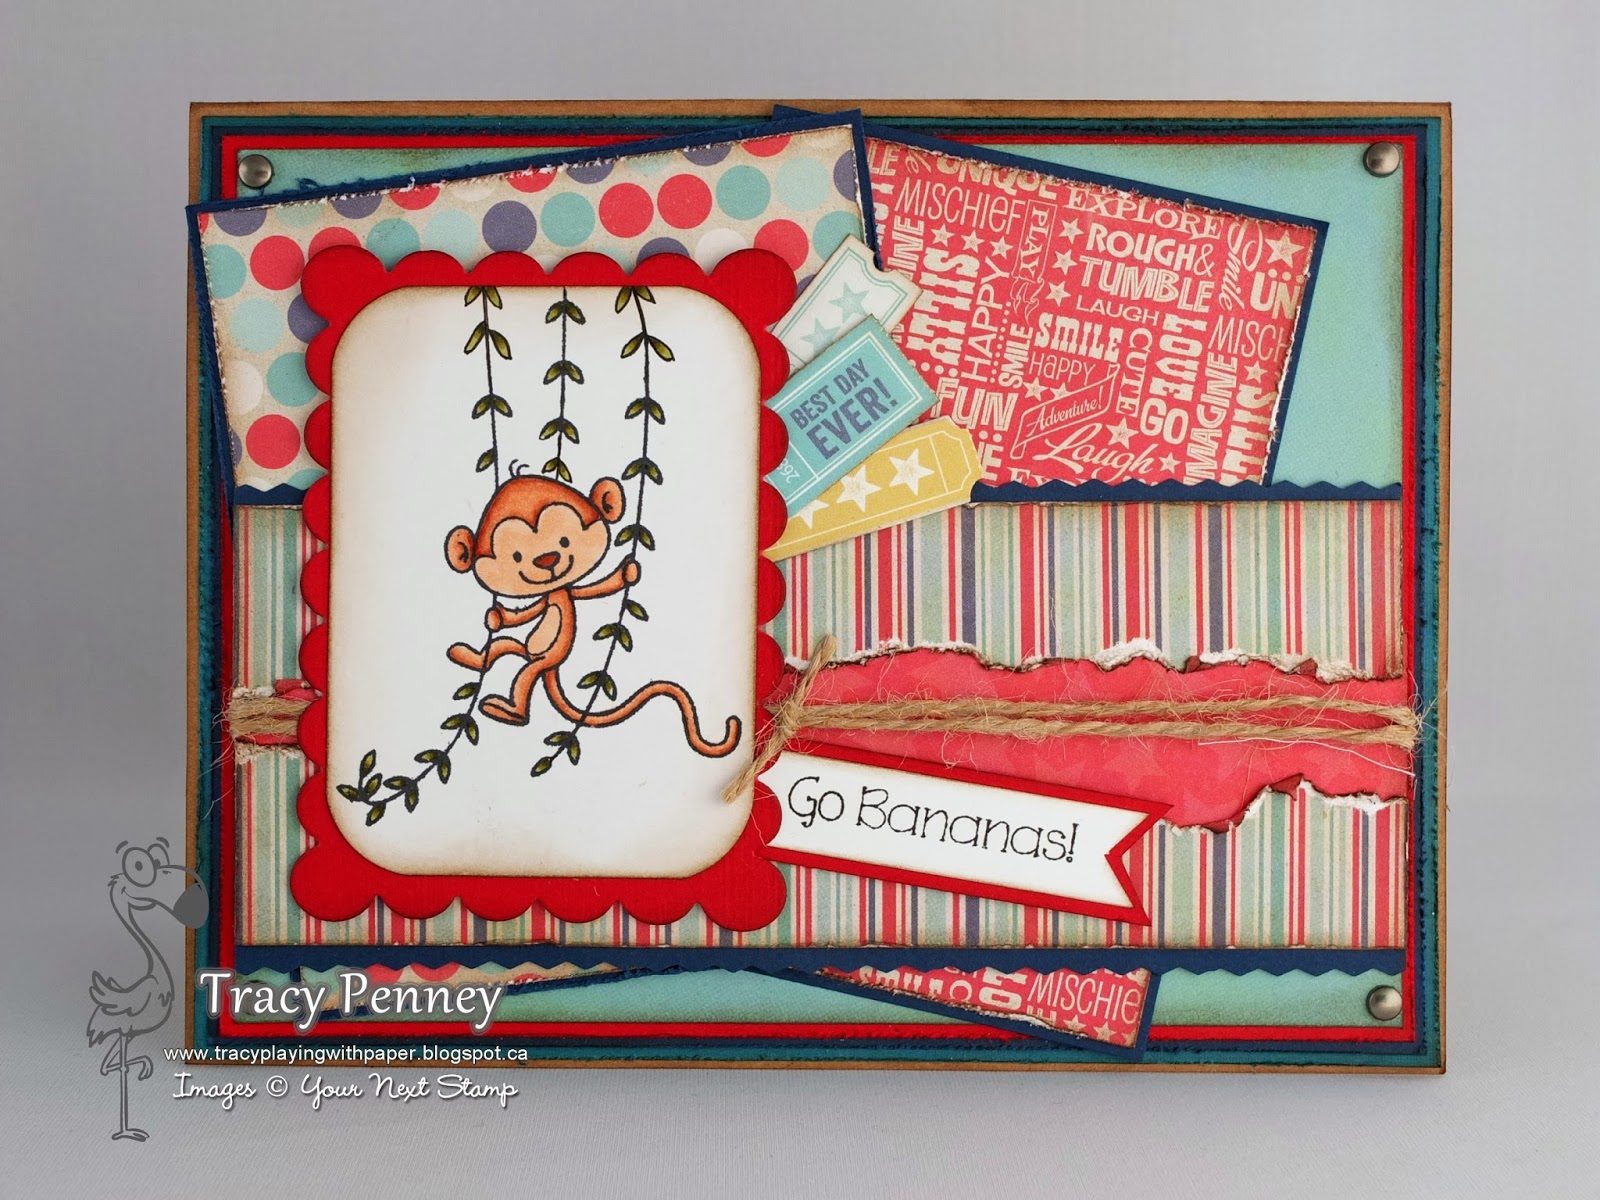
For my card, I used a cute set from Your Next Stamp called MONKEY SEE, MONKEY DO.


I used paper from Carta Bella Rough and Tumble and went to crazy with some distressing. Around the image I used a cute die cut frame from Your Next Stamp call the Journal Card Scallop Insert die. I haven't used it yet for scrapbooking, however it make for a cute scalloped matting for my image.


Of course I coordinated the inside of my card with some of the coordinating paper and scraps from the front of the card. These monkeys are perfect inside and out!


Are you ready to monkey around with our CALL THE VET challenge this week? Ink up your animal stamps and play along. Link up your project on the LITTLE RED WAGON BLOG. Remember to check out the fabulous creations by the other Girlfriends. I know they will have a lot of great inspiration for you this week.

Thanks for stopping by and have a super crafty day!

Tracy